Block paving driveways are among the most popular choices for Dublin homeowners, and it’s easy to see why. They combine exceptional durability with timeless aesthetic appeal, offering a versatile solution that can complement any property style. Whether you’re considering a traditional herringbone pattern or a contemporary linear design, understanding the installation process helps you appreciate the craftsmanship involved.
At Unlimited Driveways & Patios, we’ve installed countless block paving driveways across Dublin, and we’re sharing our professional insights to help you understand what goes into creating a stunning, long-lasting driveway.
Why Choose Block Paving?
Before we dive into the installation process, let’s look at why block paving remains such a popular choice:
Durability: Properly installed block paving can last 20+ years, easily withstanding Ireland’s wet weather and temperature fluctuations.
Versatility: Available in numerous colours, shapes, and patterns, block paving suits both modern and traditional properties across Tallaght, Dundrum, Lucan, and beyond.
Easy Repairs: Unlike tarmac or concrete, individual blocks can be replaced if damaged, making maintenance straightforward and cost-effective.
Kerb Appeal: A well-designed block paving driveway significantly enhances your property’s value and visual impact.
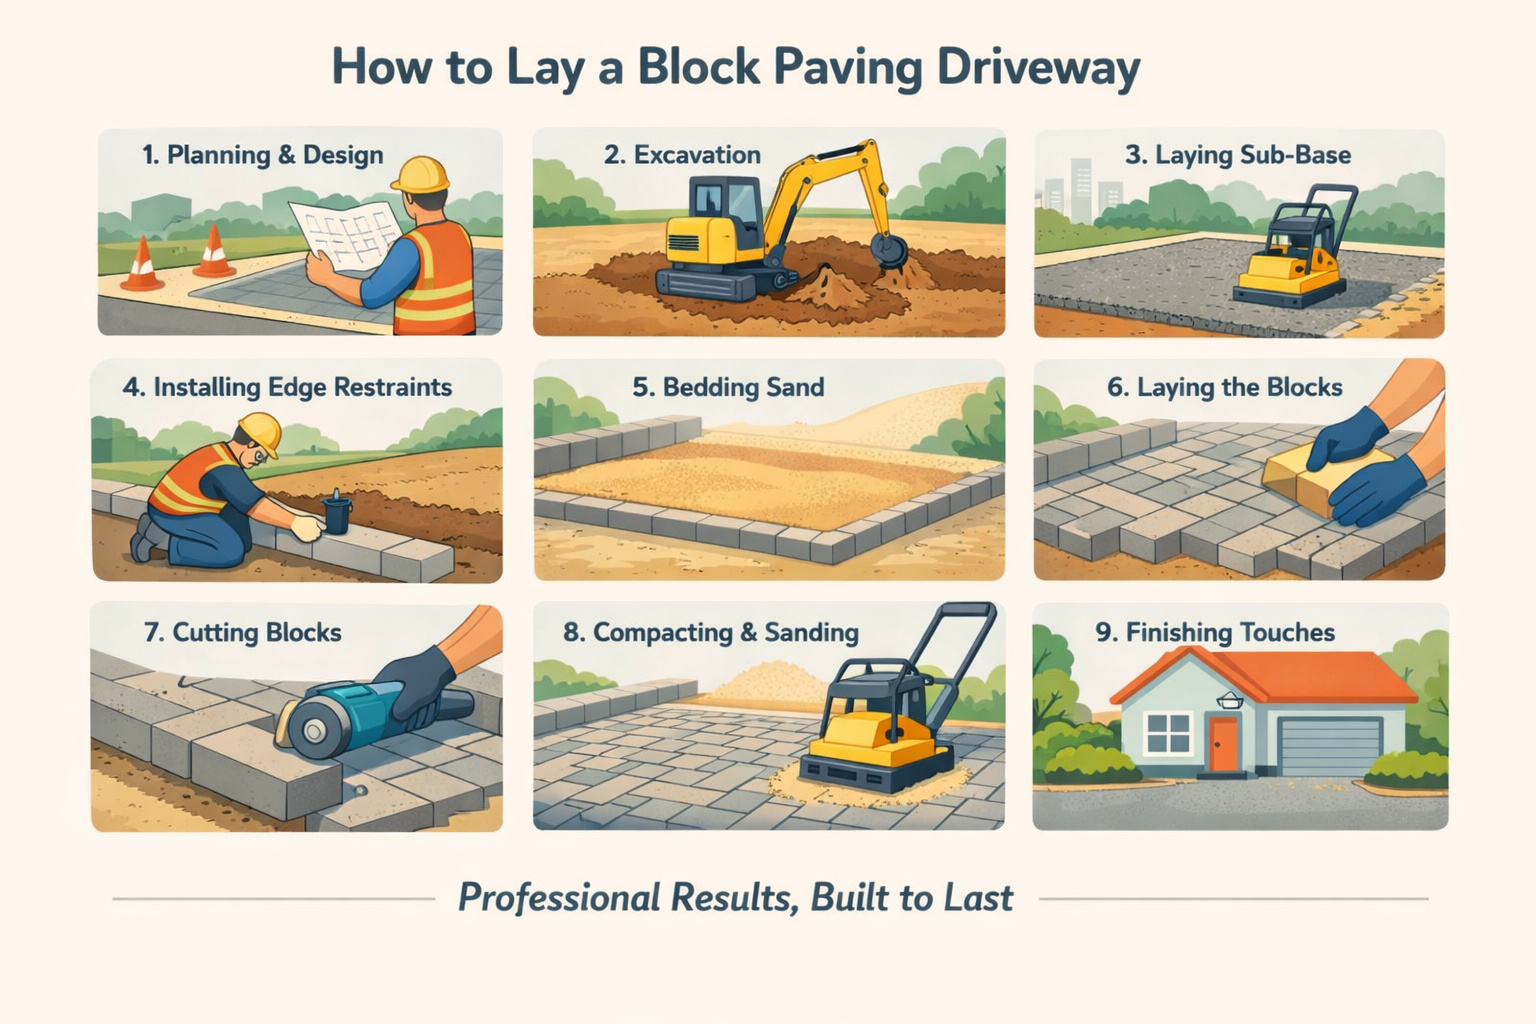
The Block Paving Installation Process
Installing a block paving driveway is a skilled job that requires precision, experience, and the right equipment. Here’s how professionals approach the work:
Step 1: Planning and Preparation
The foundation of any successful driveway project starts with thorough planning. This involves measuring the area accurately, choosing your block style and colour, and considering the pattern you’d like. You’ll also need to check for any underground services like water pipes or electrical cables and obtain necessary permissions if your driveway affects public pathways.
Proper planning also means thinking about drainage. In Ireland’s wet climate, effective surface water management isn’t optional – it’s essential. Professional installers will design the driveway with appropriate falls and drainage solutions to prevent water pooling and protect your property.
Step 2: Excavation
Once planning is complete, excavation begins. The existing surface must be removed, and the area excavated to the correct depth – typically 200-250mm for domestic driveways, though this can vary depending on the ground conditions and expected vehicle weight.
This stage is crucial because inadequate excavation depth is one of the most common causes of driveway failure. The excavation must also create a level base with appropriate gradients for drainage, typically a 1:60 fall away from your property.
Step 3: Sub-Base Installation
The sub-base is the foundation of your driveway and absolutely critical to its longevity. A Type 1 MOT (Ministry of Transport) aggregate is typically used, consisting of crushed stone and smaller particles that compact together to create a solid foundation.
The sub-base is laid in layers, usually no more than 100mm at a time, with each layer thoroughly compacted using a vibrating plate compactor or roller. For domestic driveways, a total sub-base depth of 100-150mm is standard, though heavier vehicles may require more.
Proper compaction at this stage prevents future sinking or subsidence. Each layer should be wetted slightly before compaction for optimal results.
Step 4: Installing Edge Restraints
Before laying blocks, edge restraints must be installed around the perimeter. These are typically concrete haunching (a concrete border) that holds the edge blocks in position and prevents the entire driveway from spreading outward over time.
The edge restraints should be installed to the correct height, allowing for the thickness of the blocks plus the bedding layer. Getting this right ensures your finished driveway sits at the perfect level relative to surrounding areas.
Step 5: Laying the Bedding Layer
A sharp sand bedding layer, typically 30-40mm thick, is screeded level across the compacted sub-base. This layer allows for minor adjustments when laying blocks and ensures even distribution of load.
The sand should be screeded to a consistent depth using rails and a straight edge. It’s important that this layer isn’t over-compacted or walked on before blocks are laid, as this can create an uneven surface.
Step 6: Laying the Blocks
Now comes the satisfying part – actually laying the blocks. Starting from a straight edge (usually against the property or garage), blocks are laid in your chosen pattern. Common patterns include herringbone (45° or 90°), stretcher bond, and basket weave.
Blocks should be laid hand-tight against each other, without gaps. They’re placed directly onto the bedding sand without mortar. Each block should be placed carefully rather than slid into position, which can disturb the bedding layer.
Professional installers work methodically across the area, often kneeling on a board placed on already-laid blocks to distribute weight and prevent disturbing the sand bed.
Step 7: Cutting Edge Blocks
Unless your driveway is a perfect rectangle and your chosen pattern aligns perfectly (which rarely happens), you’ll need to cut blocks to fit along edges and around obstacles. This requires a block splitter or angle grinder with a diamond blade.
Accurate measuring and cutting is essential for a professional finish. Cut blocks should be at least half a block wide where possible for strength and appearance.
Step 8: Compacting the Surface
Once all blocks are laid, the entire surface is compacted using a vibrating plate compactor fitted with a rubber sole plate to protect the block surface. This step beds the blocks into the sand layer and ensures they’re level and stable.
The driveway is then swept with kiln-dried jointing sand, which fills the joints between blocks. The surface is compacted again, forcing sand deep into the joints. This process may be repeated 2-3 times until joints are completely filled.
Step 9: Final Sand Application and Clean-Up
After final compaction, more jointing sand is brushed across the surface to top up the joints. The driveway should be left with a light covering of sand, which will work its way into any remaining gaps over the following days.
The site is then cleaned, any excess materials removed, and you’re left with a beautiful, functional driveway ready to use immediately.
Common Mistakes to Avoid
While block paving might look straightforward, there are several pitfalls that can lead to problems:
Insufficient sub-base depth or inadequate compaction leads to sinking and uneven surfaces within months. This is the most common cause of driveway failure.
Poor drainage planning results in water pooling, which can wash away jointing sand, cause settling, and create frost damage in winter.
Skipping edge restraints or inadequate haunching allows the driveway to spread at the edges, creating gaps and instability.
Using building sand instead of sharp sand for bedding prevents proper drainage and can cause the sand to wash away.
Incorrect block laying patterns may look acceptable initially but can affect structural integrity and accelerate wear.
How Long Does Installation Take?
For a typical domestic driveway in Dublin, professional installation usually takes 4-7 working days, depending on size, access, and weather conditions. This includes excavation, sub-base preparation, block laying, and finishing.
Trying to rush the job, particularly the compaction stages, invariably leads to problems down the line. Quality installation can’t be rushed.
Maintenance for Longevity
Once your block paving driveway is installed, minimal maintenance keeps it looking great:
- Regularly sweep away debris and leaves
- Jet wash annually to remove dirt and prevent weed growth
- Top up jointing sand if it washes out
- Treat any weed growth promptly
- Consider applying a sealant every few years for enhanced protection and easier cleaning
Why Professional Installation Matters
While some homeowners consider DIY block paving installation, the reality is that this is skilled work requiring specialist equipment. A mini excavator, vibrating plate compactor, block splitter, and laser level aren’t typically found in garden sheds.
More importantly, the expertise to create proper falls for drainage, compact sub-base correctly, and achieve a professional finish comes from years of experience. A poorly installed driveway won’t just look substandard – it will fail prematurely, costing far more to repair than professional installation would have cost initially.
Professional installers also understand local conditions. In Dublin, we deal with specific soil types, drainage challenges, and weather patterns that affect installation methods and material choices.
Transform Your Property with Professional Block Paving
A block paving driveway is a significant investment in your property that should last decades when installed correctly. The process involves careful planning, quality materials, proper equipment, and skilled craftsmanship at every stage.
At Unlimited Driveways & Patios, we’ve been installing beautiful, durable block paving driveways across Dublin, Tallaght, Dundrum, Lucan, Clondalkin, Swords, Malahide, Bray, and throughout the surrounding areas for years. Our family-run business combines decades of expertise with a commitment to quality that guarantees results you’ll love.
Every project includes:
- Free, no-obligation site surveys and quotes
- Professional design advice to suit your property
- Quality materials and expert craftsmanship
- Proper drainage solutions included as standard
- Fully guaranteed work with comprehensive insurance
- Competitive pricing with transparent quotes
Whether you’re looking for a completely new driveway in Greystones, redesigning your existing drive in Celbridge, or creating additional parking in Maynooth, our experienced team delivers excellence every time.
Ready to enhance your property with a stunning block paving driveway?
Call 01-4847182 today for your free site survey and quote.
We serve all areas across Dublin and surrounding counties – no job too big or small. Let us transform your driveway with the quality craftsmanship and professional service that Dublin homeowners trust.
Unlimited Driveways & Patios – Your trusted local experts for block paving installation in Dublin.